Imagine you have a contact database containing a list of suppliers. One of those suppliers proved themselves unreliable once to often, so your company decides not to use them any more. It is your job to delete any names from this list that belong to this particular supplier. The only problem is, the contact database contains hundreds of names, a number of which are from the suppliers company. This is where an Access Delete Query is going to prove very useful.
Delete Queries are a type of Action Query ie a Query which performs some sort of action on our database. In the case of a Delete Query, Access will find a group of records matching a given criteria and delete them from the database table. As such, we can make good use of a Delete Query in the scenario outlined above. By means of a Delete Query, we can find all the records of staff who work for the ex-supplier and delete them from the contact list. Lets take a look at the contact list we are going to working with (shortened for the purpose of this exercise):
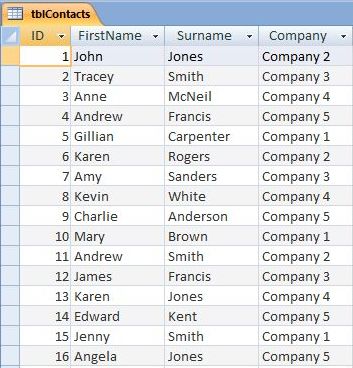 |
| Figure 1: The Contact List upon which we shall run our Delete Query. |
Lets say the name of our ex-supplier is Company 5.
So how do we create a Delete Query?
It's quite simple really. The first stage is to create an initial select query that would give us a list of all the names of staff working for Company 5. This involves entering "Company 5" as the query criteria. Once we have run the query and checked its results, we just need to change it to a Delete Query and click RUN again.
How to Create a Delete Query
Stage 1 - Creating the initial Select Query
- Select the CREATE TAB of the Access Ribbon.
- Click the QUERY DESIGN icon. It is located in the OTHER group of the CREATE ribbon.
- Select tblContacts from the SHOW TABLE dialogue box.
- Drag the asterix (*) from tblContacts down to the first column of the DESIGN GRID. This is a way of getting the query results to display all fields from the table without having to select each one individually.
- Then Drag the Company field from tblContacts down to the second column of the grid. We have added this field separately because we are going to enter a criteria in this column.
- Click on the CRITERIA row of the Company column, and add the criteria: "Company 5"
The Select Query has now been created. It should look like this:
 |
| Figure 2: The Select Query created in the first stage of the Delete Query. |
It is advisable to run the query at this point and check the results are correct. They should look like this:
 |
| Figure 2: The results from the Select Query. |
As you can see, our select query has found four records from tblContacts matching the criteria of Company 5". Since this is the correct result for the dataset we are working with, we can move onto the second stage of the process: converting the Select Query to a Delete Query.
Stage 2 - Converting the Initial Select Query to a Delete Query
- If you look at the QUERY TYPE group of the DESIGN ribbon, you will notice that the SELECT QUERY icon is highlighted orange. We need to change this to DELETE QUERY. To do this just click the DELETE QUERY icon further along the group.

Figure 3: The QUERY TYPE group of the DESIGN ribbon.
The DELETE QUERY icon is highlighted orange. - After the clicking the DELETE icon, you will notice that the row of SHOW tick boxes disappears from the DESIGN GRID, along with the row for SORT. A new row entitled DELETE has taken their place. Access has filled in the values of FROM and WHERE in the first and second columns respectively. These are SQL Keywords: the FROM keyword indicates the first column contains fields from tblContacts, and WHERE indicates the Company column contains a criteria against the data stored in this field.

Figure 4: The QUERY DESIGN GRID for our
DELETE Query. Notice the new row for DELETE
containing the SQL FROM and WHERE
Keywords. - Click RUN from the QUERY RESULTS group.
- Click YES when prompted whether we want to delete the number of rows matching our query criteria. This will be four rows for the dataset we have been working with.


We can now go back and open the tblContacts table. As you can see from Figure 5 below, all Company 5 contacts have been removed by our DELETE QUERY.
 |
| Figure 5: The tblContacts table after Company 5 contacts have been removed. |


No comments:
Post a Comment